
Introduction
Thank you for purchasing the Kosmetisk Template by Pixco.
This documentation provides all the necessary steps to help you set up and customize the template to suit your needs.
Don’t have the template yet? Purchase it here.
Getting Started
To maintain brand consistency, we recommend starting with your "Styles" settings.
This helps ensure consistent fonts and colors across your website. To get started, click the Assets tab in the top-left panel, scroll down to Styles and update the fonts and colors to align with your brand.

Customizing the Header
The header is a vital part of your website’s navigation, providing users with quick access to key links.
You can fully customize the header using the Layout Template which is located in the Assets tab and called Main, Framer’s innovative method for creating reusable elements that apply across all pages, removing the need to update components and elements on each page individually.
Elements in a Layout Template are easily identifiable as they are named accordingly.
Editing the Header
To edit the header, double-click the header component, or go to Assets and select Main under the Template section.
Within the header, you can easily:
Upload your logo by double-clicking the logo component and replacing it with your own file.
Change menu item names.
Swap the booking button link to a different booking platform that you might already be using.

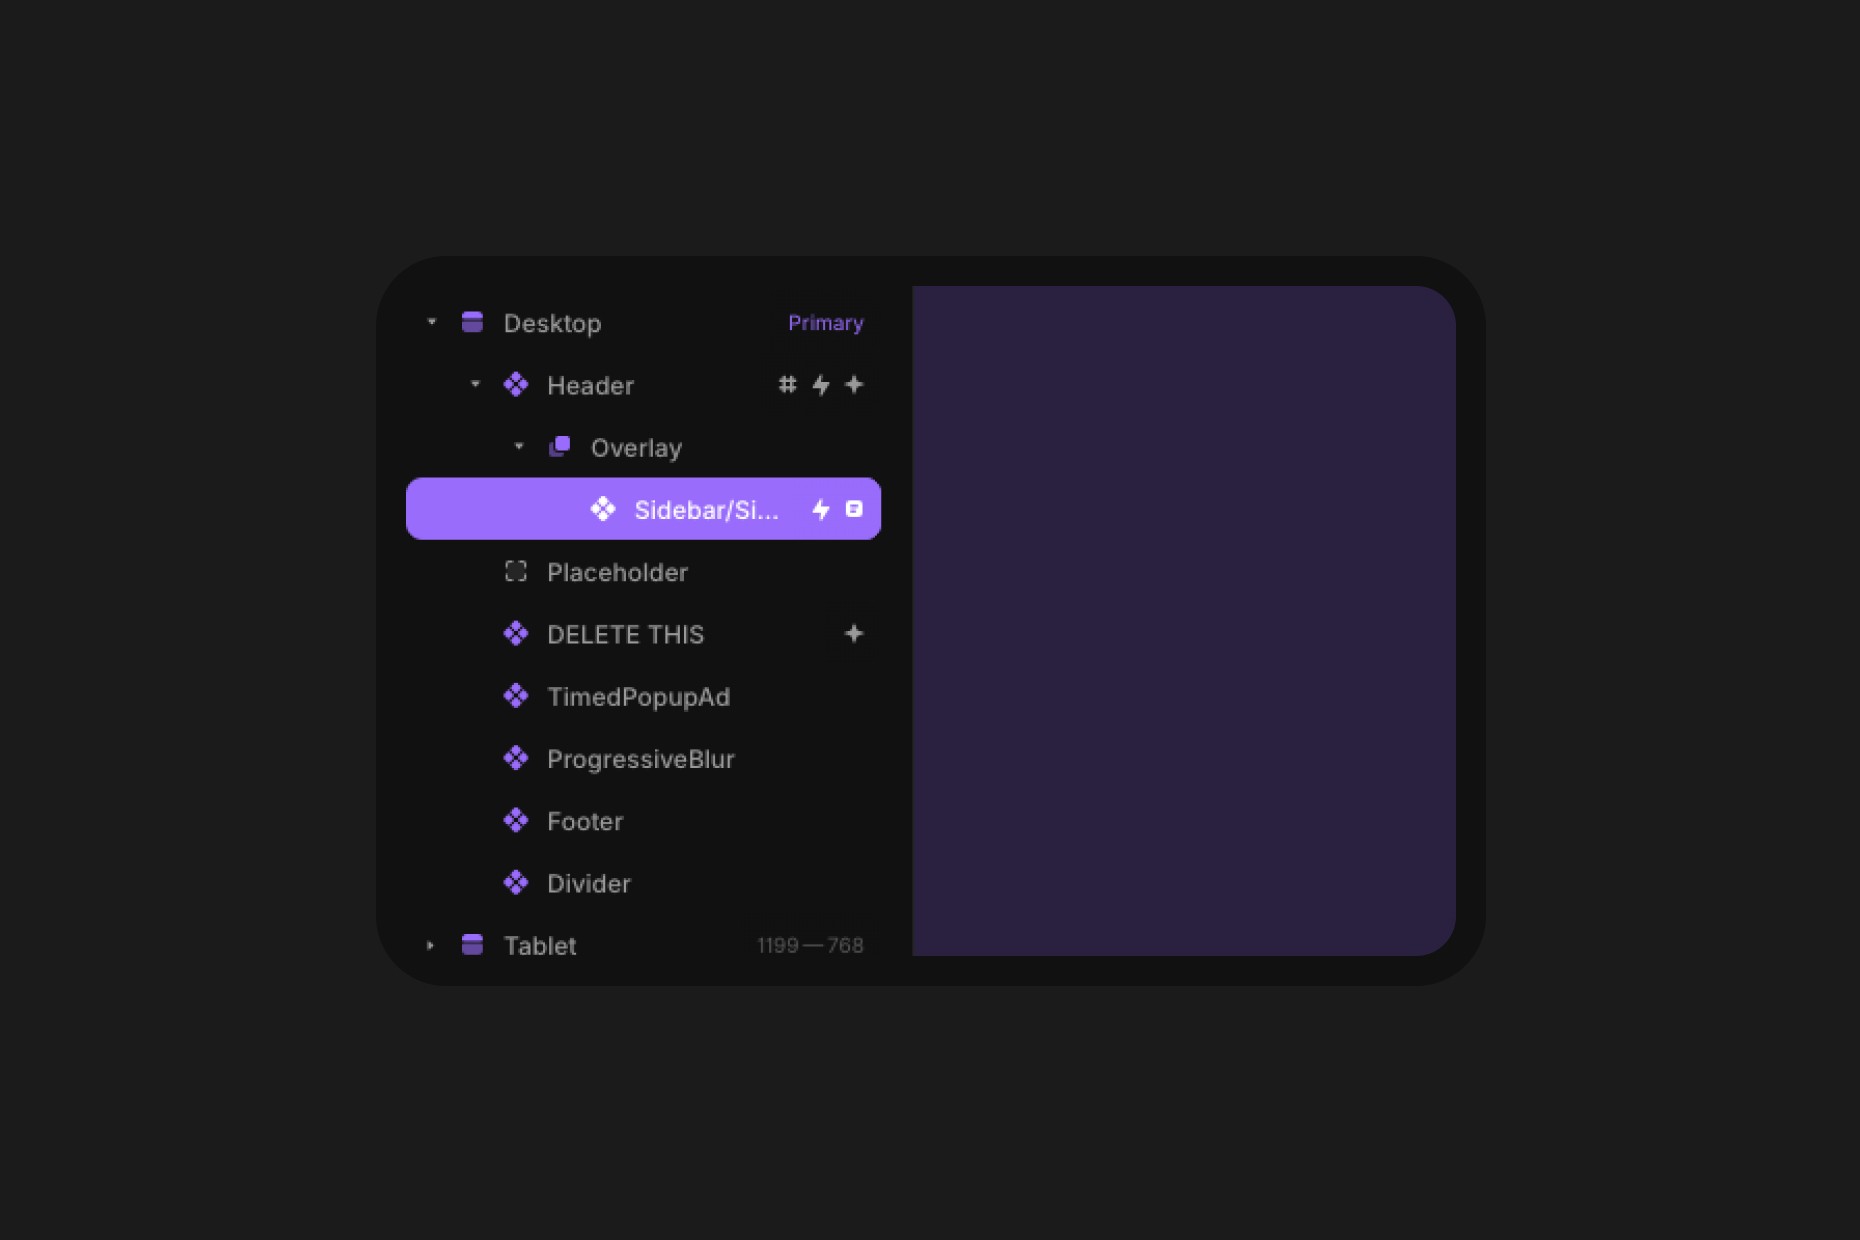
Editing the Menu for Mobile
This design includes a stylish fullscreen, overlay-style menu. To modify the mobile menu, click the Header component > Overlay > Sidebar (Layers tab, the “Header” layer will be highlighted in purple, showing it’s the active layer).
Customizing the Footer
Customizing the footer is easy and intuitive. Like the header, the footer can be fully tailored to your needs.
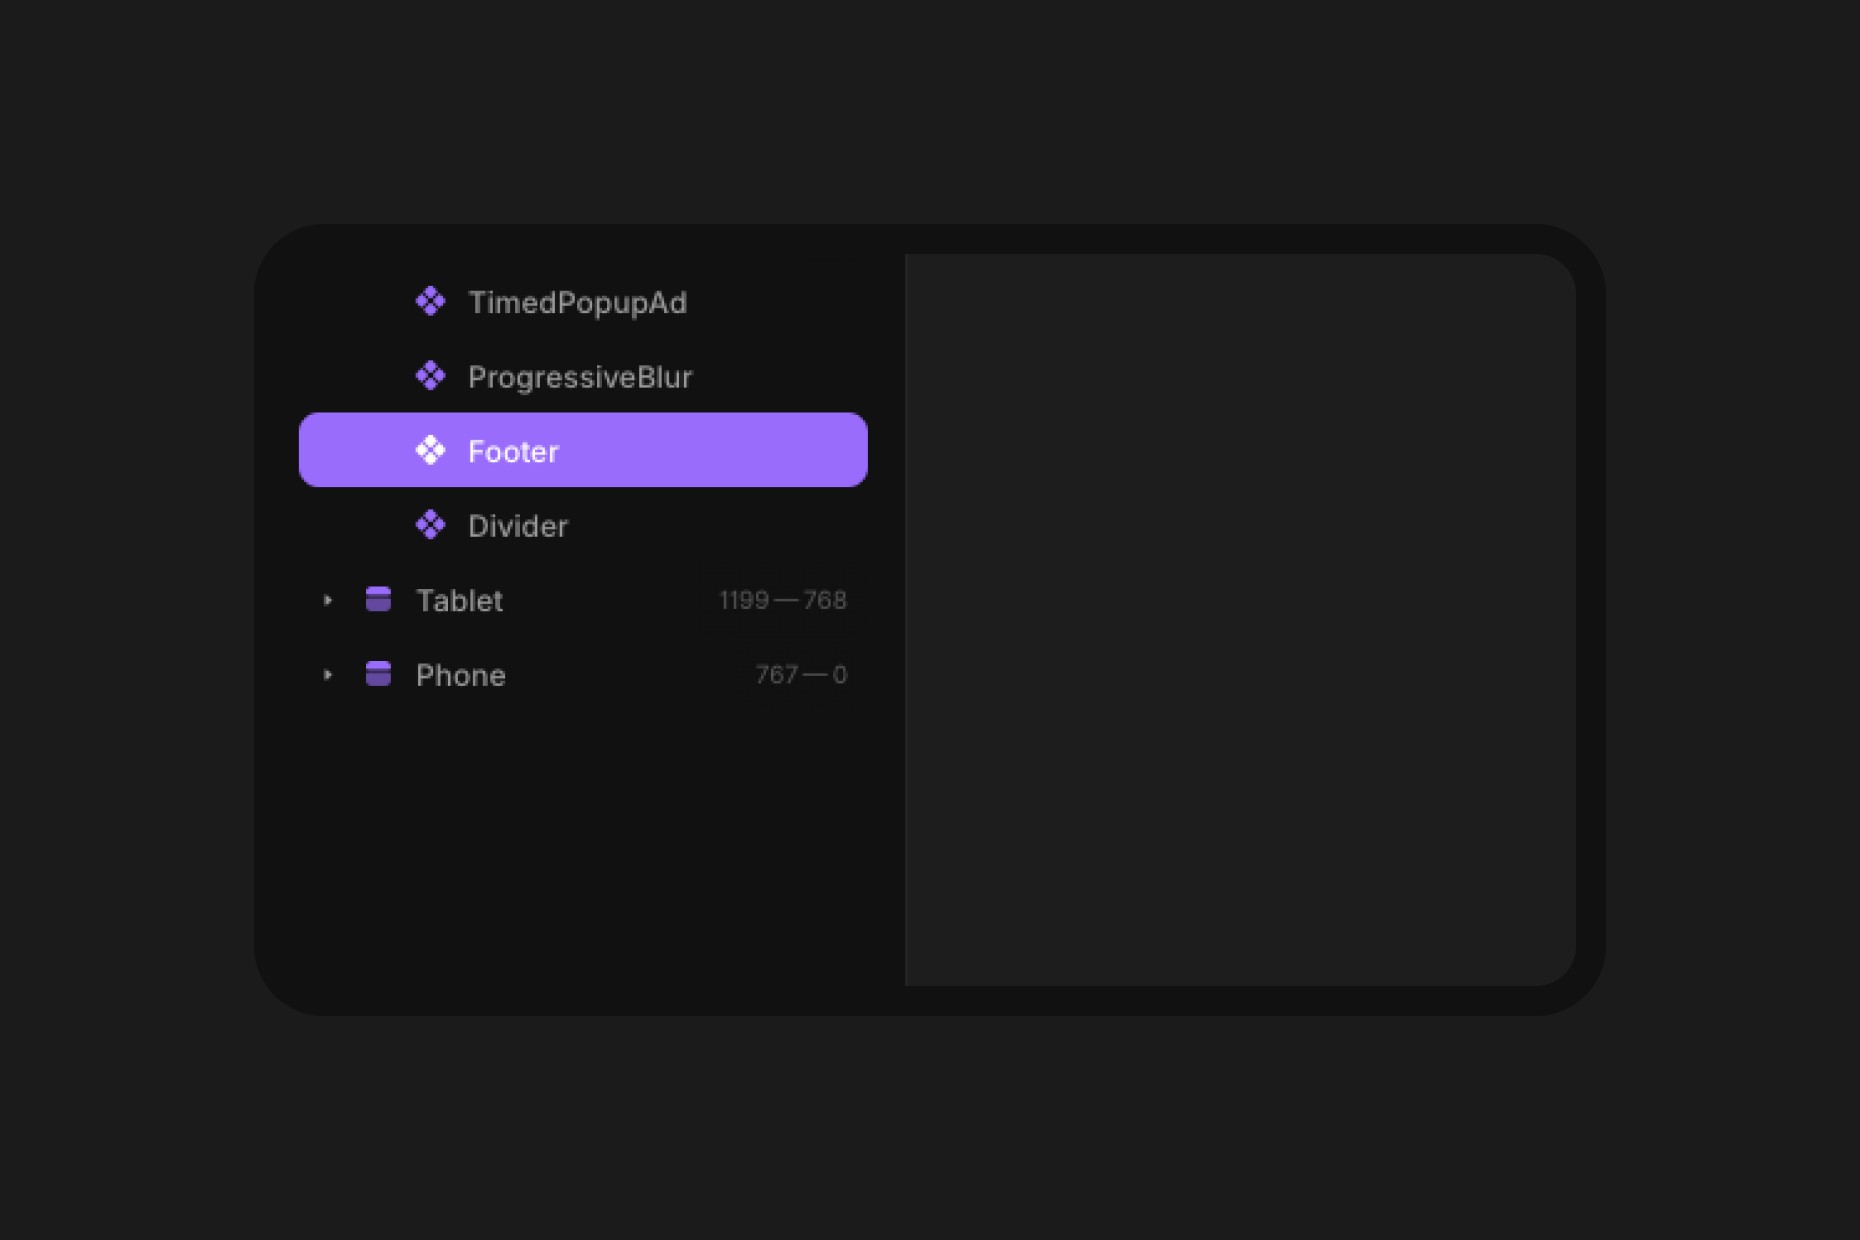
To begin, double-click the Footer component to modify its elements, including the footer menu. Some elements may seem hidden across breakpoints (Desktop, Tablet, Mobile) in order to compensate for layout changes, so make sure you take a close look at all the breakpoints when making changes.
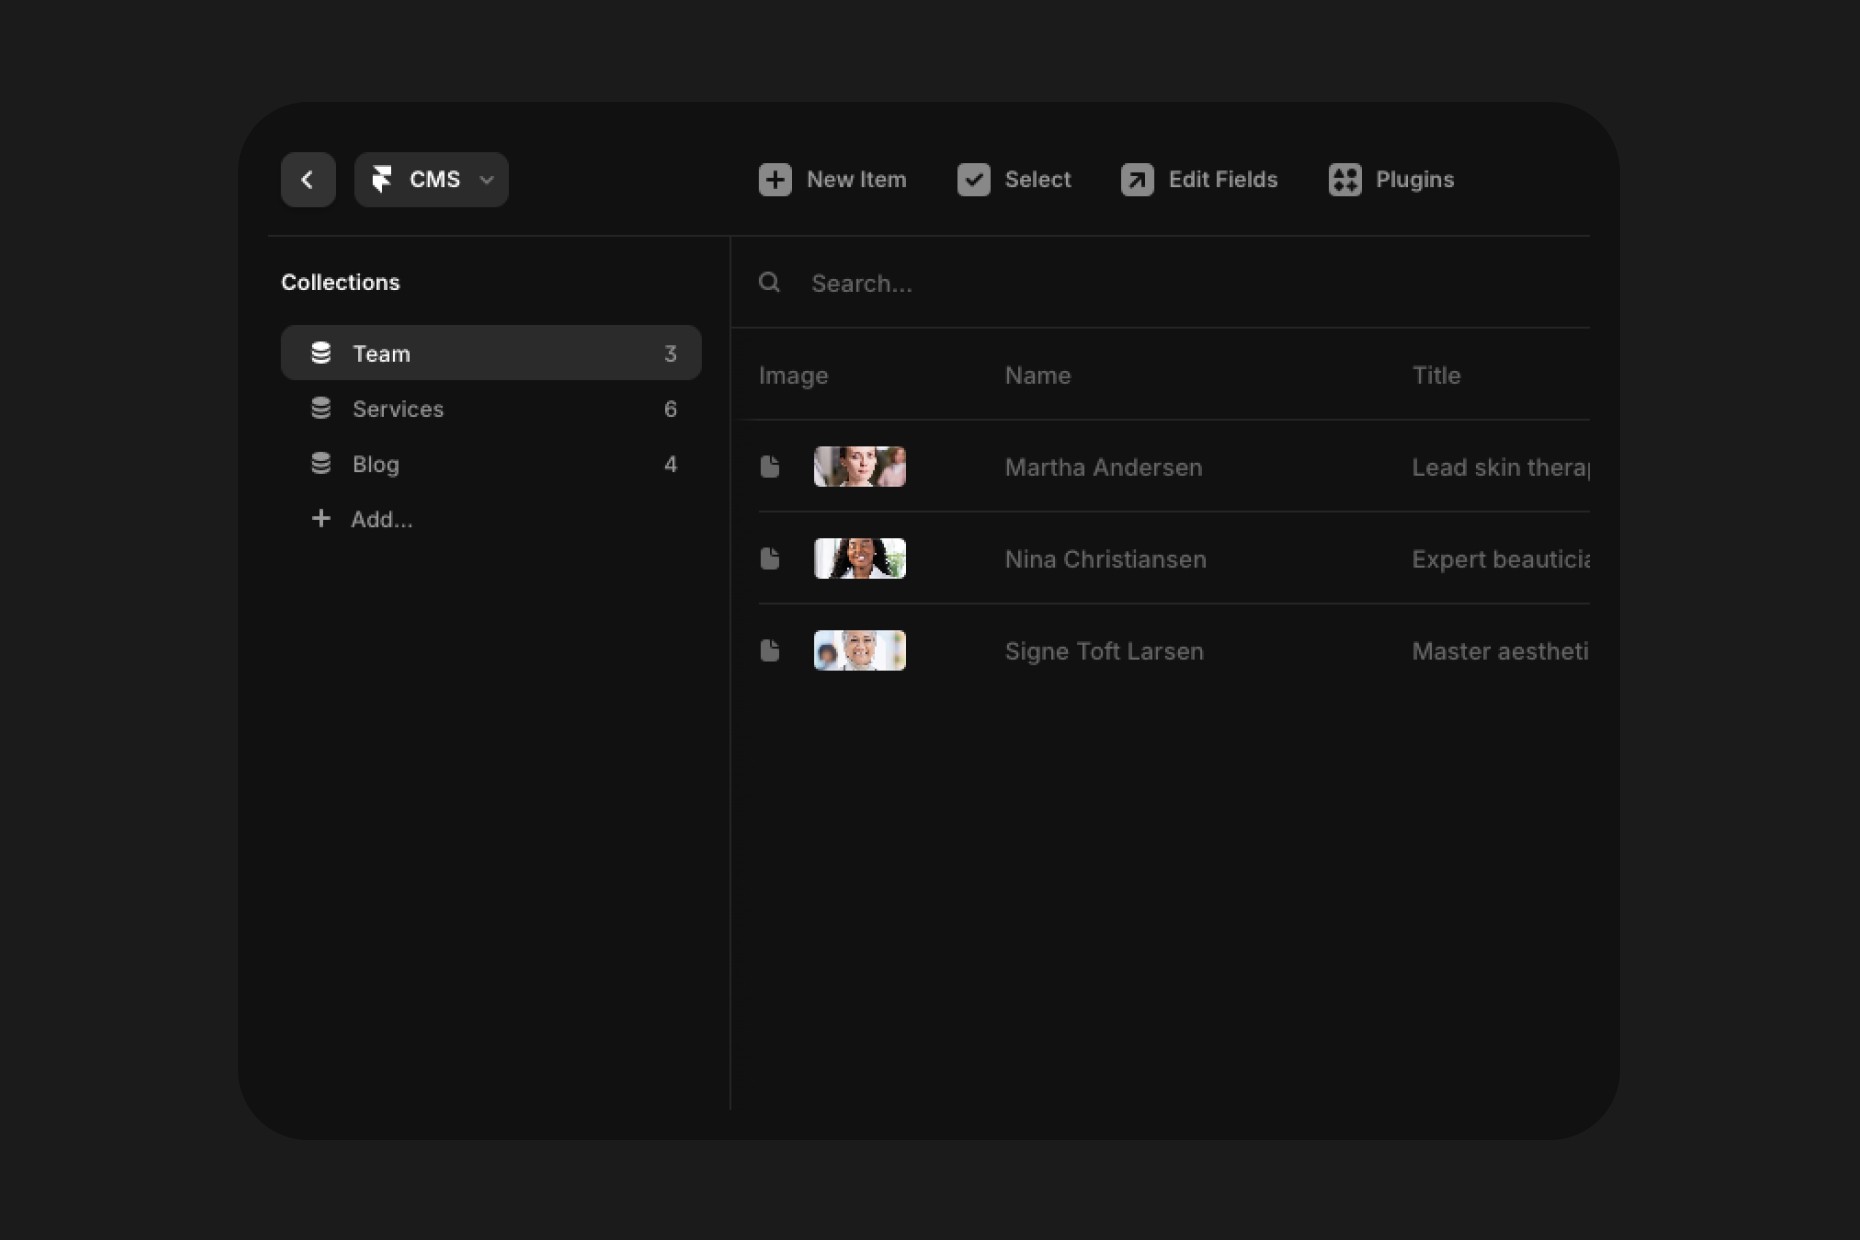
Customizing the CMS
Within the CMS you can edit Team members, Services and add new Blog posts. To edit the CMS, simply tap the CMS button at the top of the toolbar within Framer which will open up the collections within the Template.
Many of the functions within the template rely on CMS items to make it easier and more efficient for you to edit content across the template without having to go through layers. For example, for the Services that show up on the homepage you can select an Index for the items and it will define which will be featured and also the order in which they are shown.
Within the Services collection you can also define sub-services for each treatment, think of it like a category with multiple products.
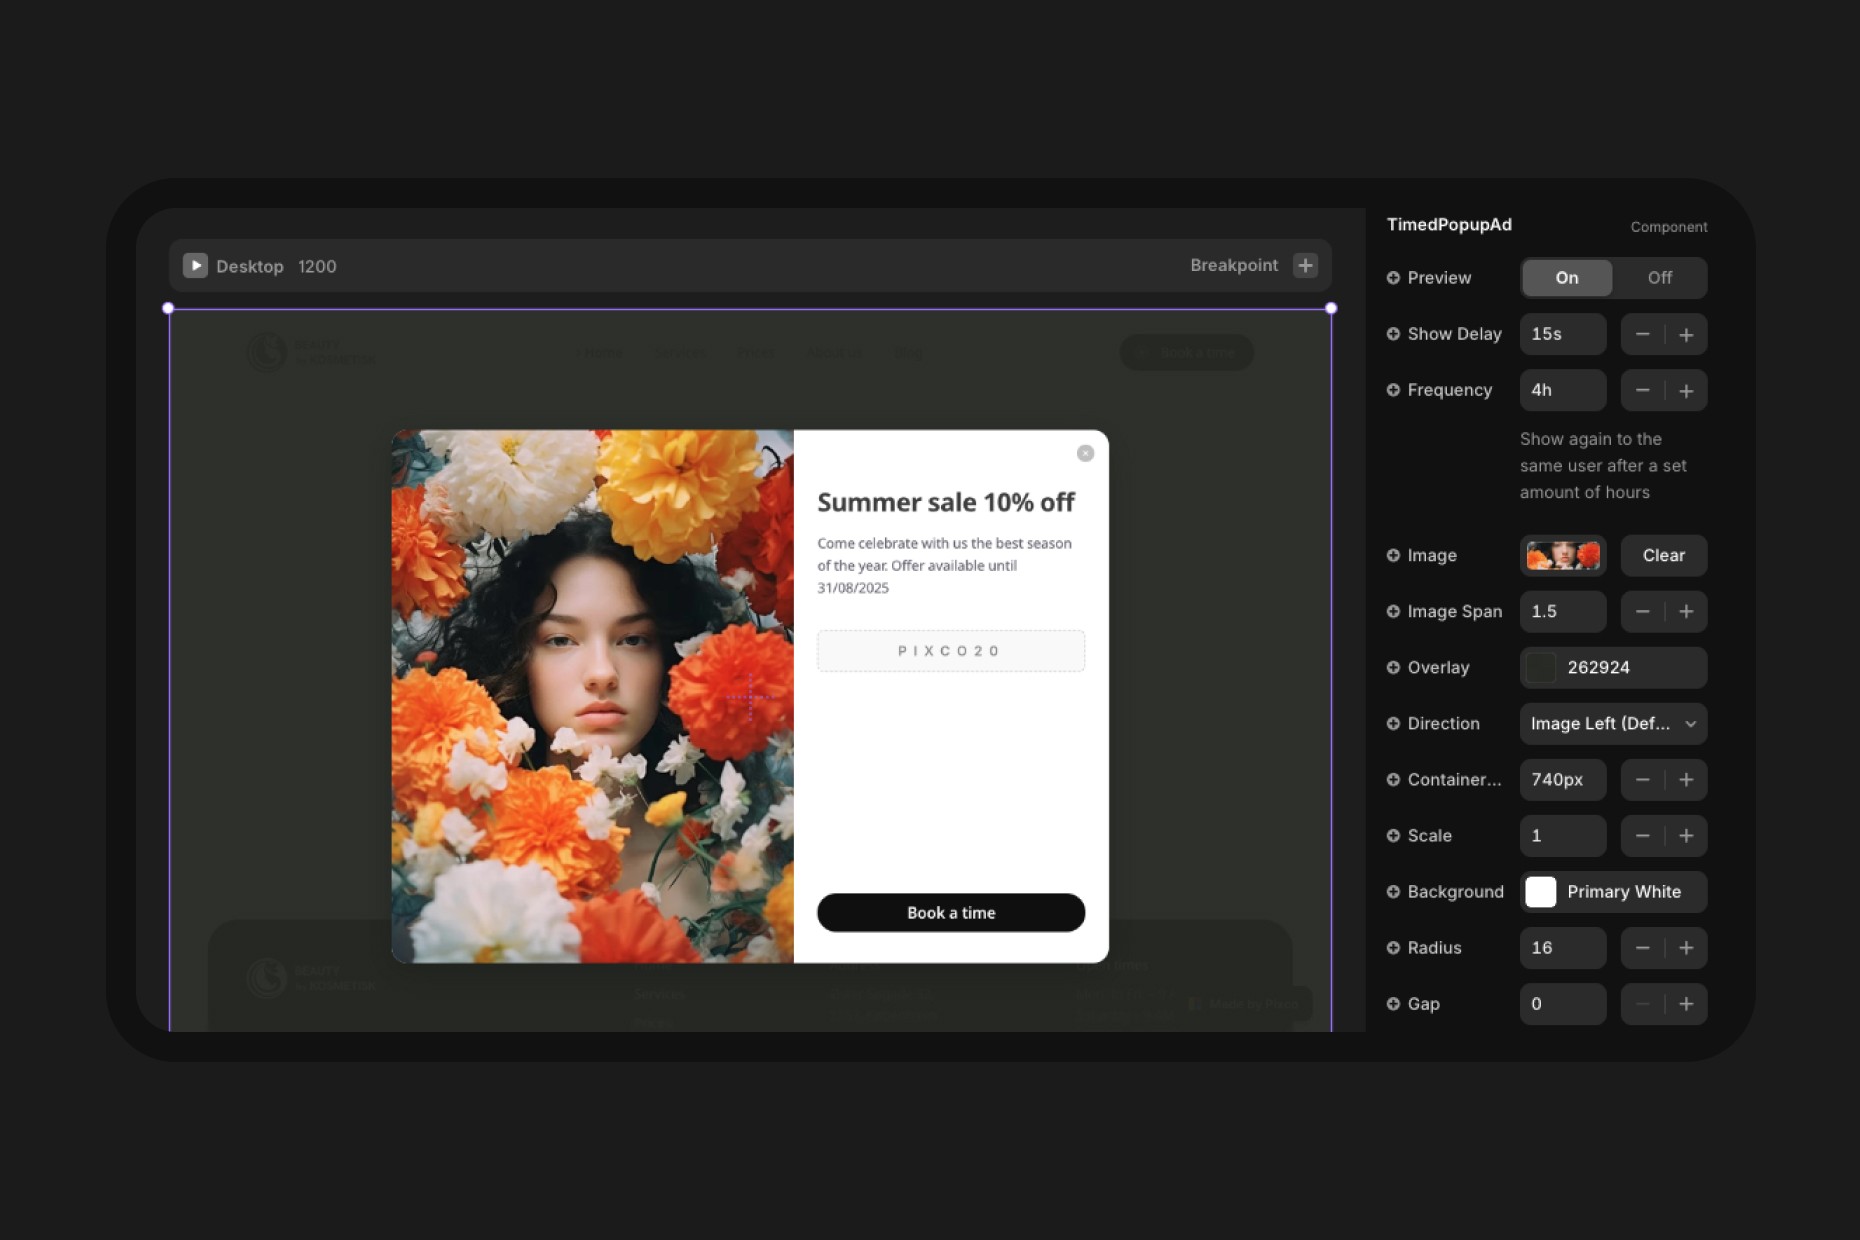
Editing the Timed Popup Ad
The Timed Popup Ad is a premium component made by us and it is included for free with this template. The component offers many options to customize it so that you can offer seasonal offers and discounts to your customers.
To edit the component, go to the Main template within the Assets tab and select the component from the layers, you only have to update it on Desktop and it will reflect on other devices if the settings aren't case specific to the device. Make sure you turn the Preview On while editing and Off once you're done.
Control the frequency at which the popup is displayed, we recommend keeping the default settings as aggressive ads might not be seen kindly by customers.
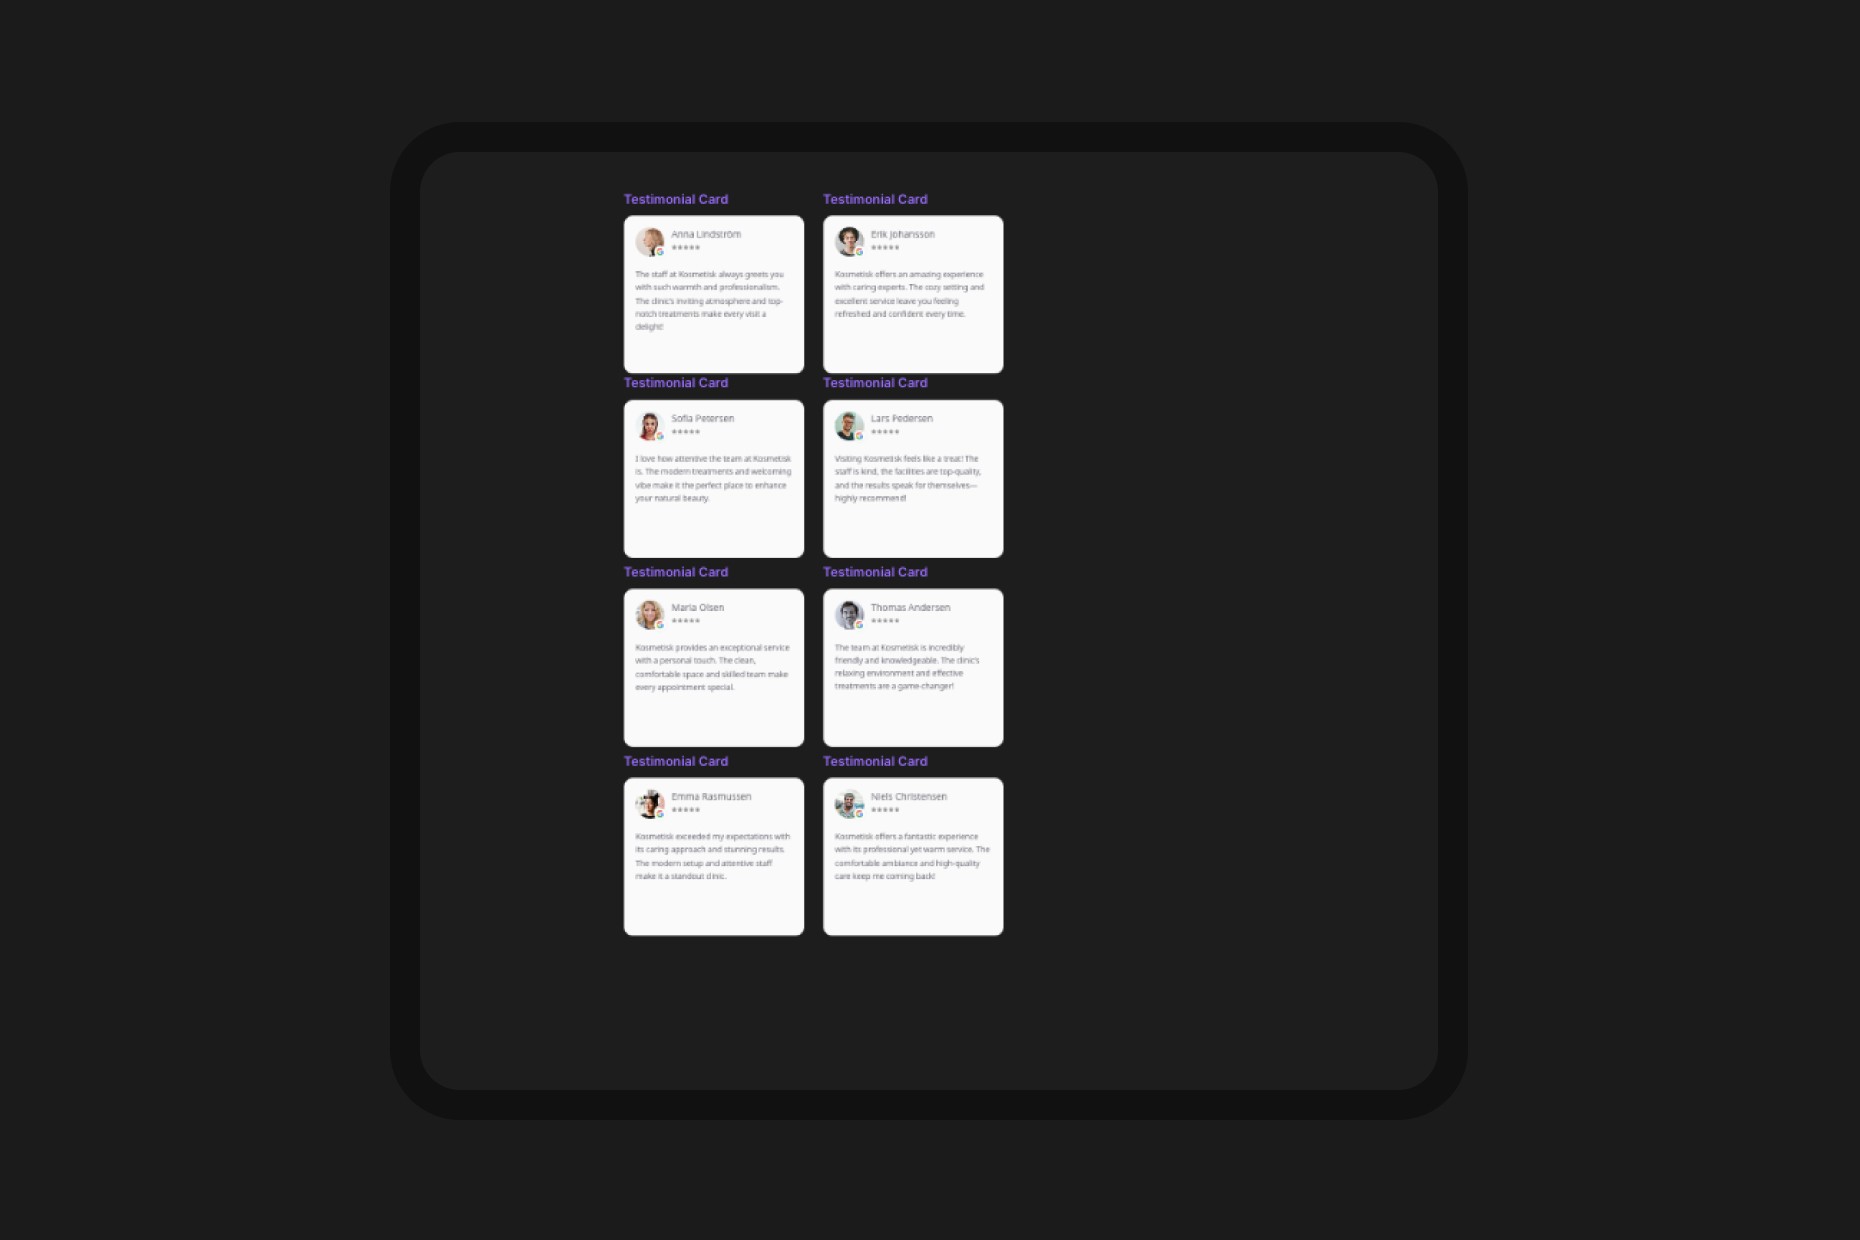
Updating Testimonials on the Homepage
Updating the testimonials from customers to match your own business is very simple. On the homepage simply scroll to the side of the Canvas and you will see eight cards. Each of those cards is already connected to their specific placement within their allocated section.
Simply click on one of the cards and on the right hand side you will see the properties expunged and ready to be populated with your own content. Repeat the process for each card and that's it, you will see the changes reflected on the homepage.
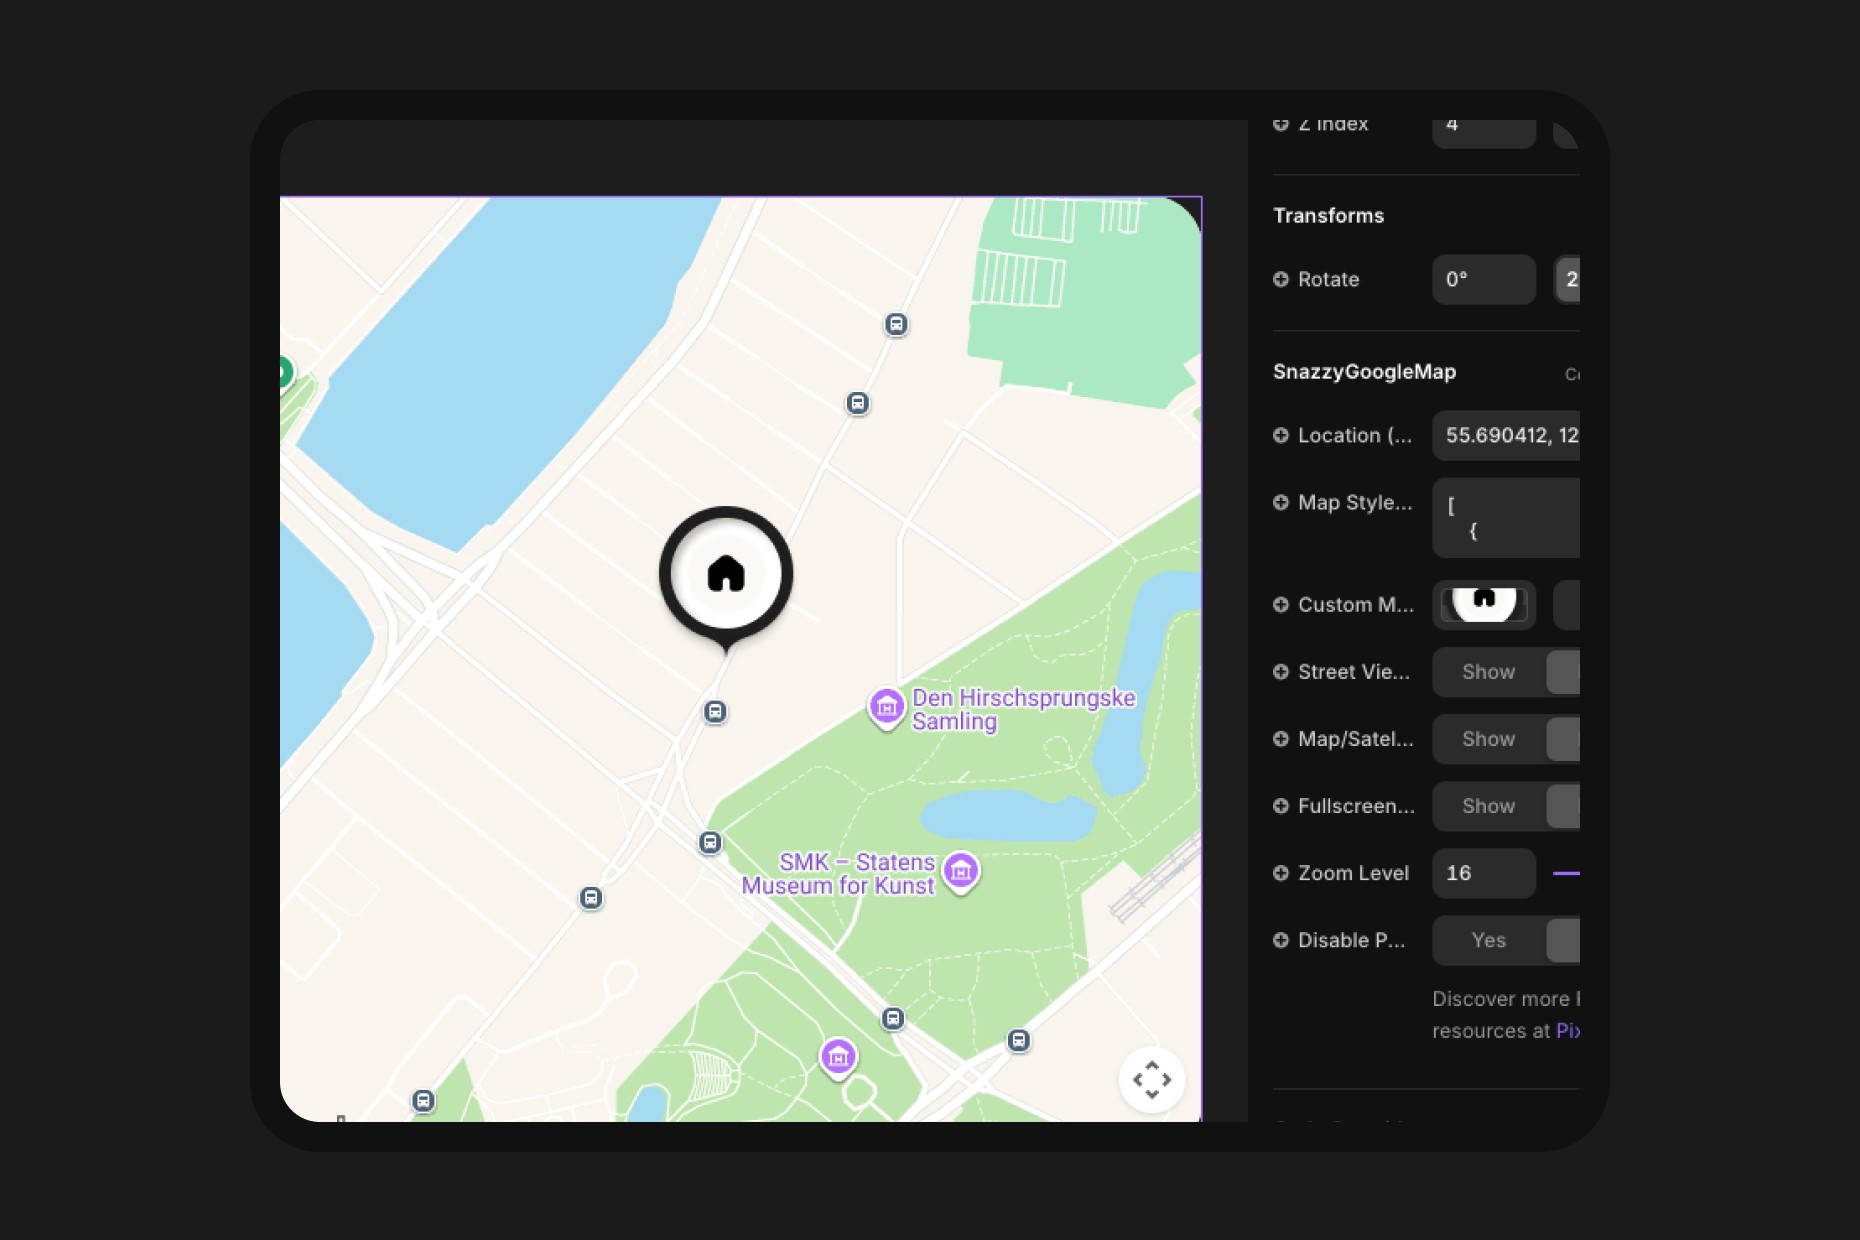
Editing the Contact & Map Section
The section that repeats across the template is a component which only needs to be edited once and it will reflect across the entire template. Simply double click on it and it will open up in the component view where you cane easily update your information and also change the location on the interactive map.
The interactive map is another component built by us and it is provided for free with the template, the component allows you to style the map to any colors you want, you simply grab a style from Snazzy Maps and replace it within the component. You can of course change the coordinates to match your own locations (grab them from Google Maps) and even change the look of the pin.
The design of the Pin is provided in the Design Pages of the template so you can customize it to your needs.
Connecting the Template to Tidio
One of the great features of this template is the integration with Tidio as it creates a chat bubble so you can fully interact with your customers no matter the time. They offer a free plan and you don't require a paid license to get started. The reason we chose Tidio is their user friendly platform, reliability, performance and the mobile app which connects your mobile phone to your website.
Imagine your customers writing you on your website and it pops up a message on your mobile device just like it would from Messenger or iMessage so you can help your customers on the go, no matter where you are.
To get started, go to Tidio's website and sign-up for a free plan, you can connect multiple services to them to keep all your customer interactions in one place but for now, let's focus simply on setting it up and connecting it to the template.
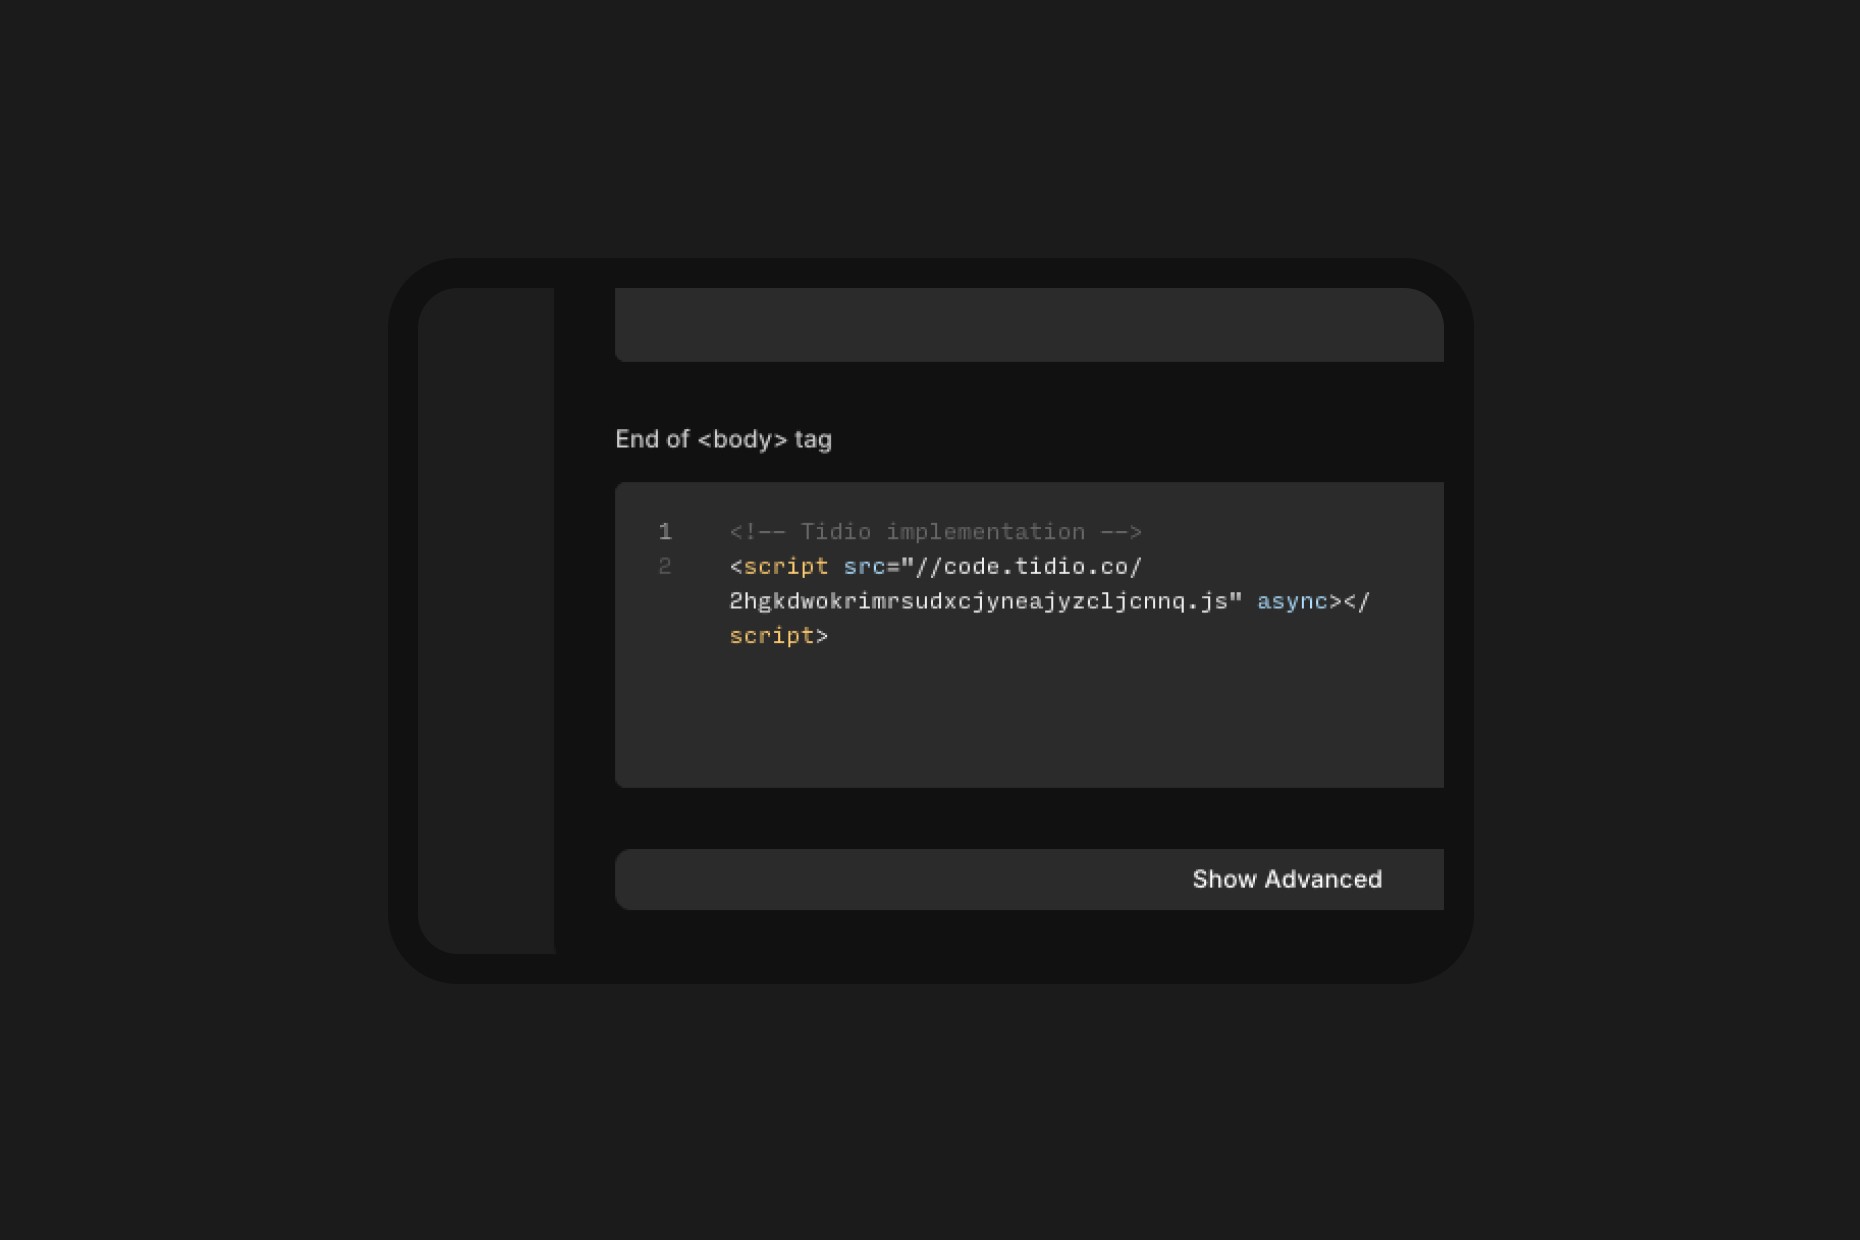
Follow the steps provided to sign-up and once you have done so, pick manual installation of the chat bubble. They will provide you with a code that you need to copy-paste.
Once you get the code, go to the template's Site Settings (top right corner Gear Icon) > General > scroll down to Custom Code > paste the code within End of <body> tag. That's it, you should be ready to go, if everything went well, Tidio will provide a message within the setup screen that the implementation was successful.
If you want to edit the appearance of the chat bubble, add your own logo, colors, welcome message and general settings for when you are available, you can do that straight from Tidio's dashboard and it will automatically reflect on your website after you confirm the changes.

Editing the Booking Form
To edit the contact or booking form you simply double click the component within the specific page and you make changes to the first variant (the one on the left called Primary) and it will reflect across all instances of your forms throughout the template.

